USA Visa online application registration to get a non immigrant visa for travel to USA is a online process.
Now a days getting a tourist visa has become much more easier following an easy and simple process which will help you to apply for the same in a faster and more efficient way.
The first thing to apply for the tourist visa is to register yourself on CGI US Travel Docs Portal create your profile select the required Visa Class and complete an application.
In this blog we will guide you how you can step by step create your profile and complete your USA Visa online application Registration this is when you are applying for the tourist Visa from India as every country has different portal though the process is almost same.
If you want to know more about the Visa and Documents read our another blog of USA Visa How to apply for B1/B2 USA Tourist Visa from India?
Steps by Step process for USA Visa online Application Registration
Step 1
If you are applying for USA Visa then you have to create a profile on USTravelDocs where you can apply, schedule and track your Passport.
Visit https://www.ustraveldocs.com/
Step 2
The next step is to choose you location your country of residence select the one and then you will be directed to the country US Online Portal.
If you are applying for US Visa from India then you can choose to click on link below https://www.ustraveldocs.com/in/en
Step 3
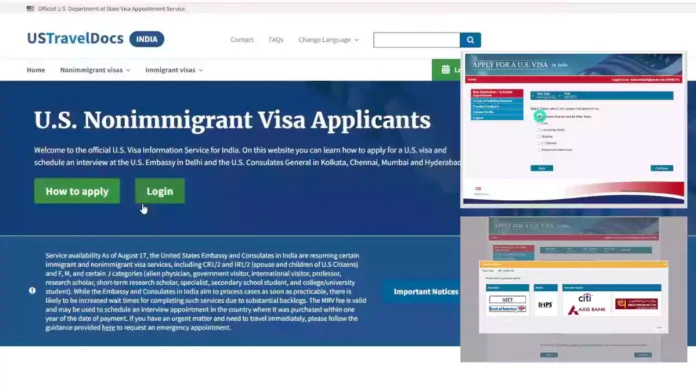
Step will take you to choose a visa category as you are applying for Tourist/Business Visa then it will come under Nonimmigrant Visa https://www.ustraveldocs.com/in/en
Bonus Read: How to apply for B1/B2 USA Tourist Visa from India?
Step 4
In order to create a profile for Nonimmigrant Visa applicants click on Login any update or announcement notice for changes will pop up on this page https://www.ustraveldocs.com/in/en
Step 5
This step will take you to the main profile login page where you can select New User and enter personal details and choose a password and create profile https://portal.ustraveldocs.com/?country=India&language=English
Step 6
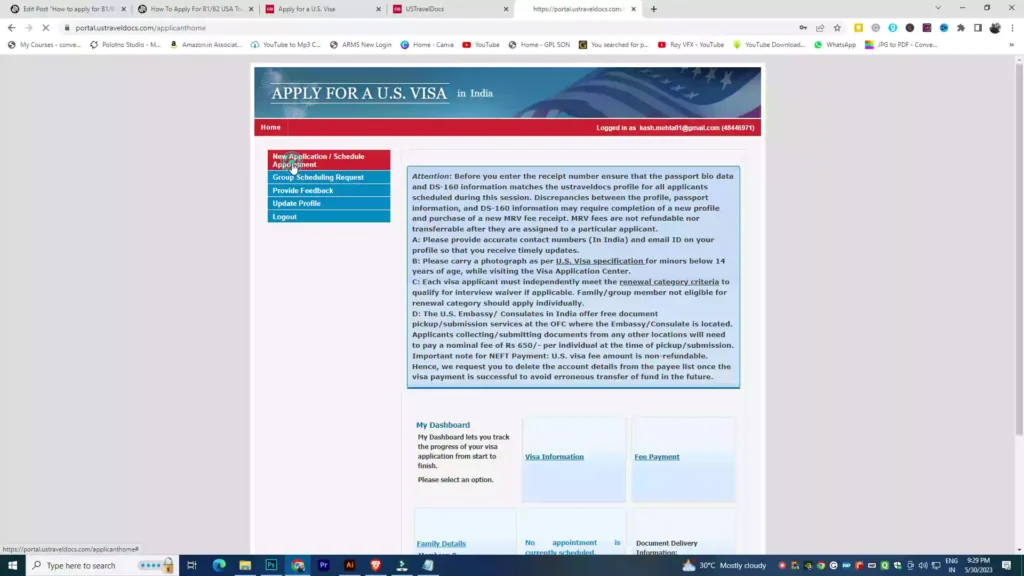
Once you Login it will take you inside the main dashboard of your profile where you can select New Applicant/ Schedule Appointment tab.
Step 7
This is one of the most important step where you will undergo step by step refer slide kindly click next and follow the same till personal data page appears.
These steps will help you to choose the category of your visa you are applying, the language in which you want to appear for interview and location of interview.
Step 8
When you are completing your application on Personal information page it will ask you for DS 160 Confirmation number.
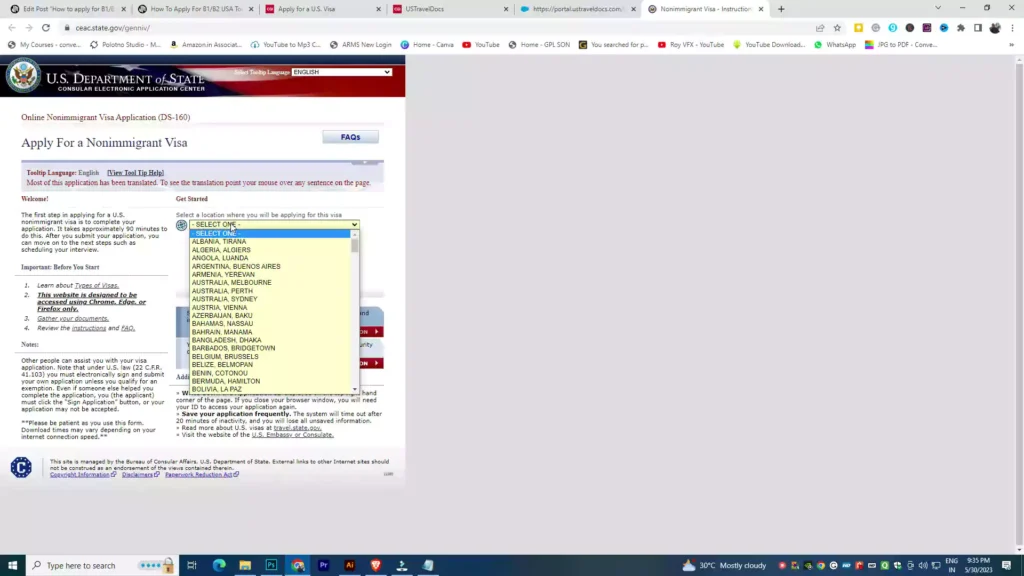
DS 160 is a complete Non immigrant Visa application of yours consisting of all the information to access DS 160 the Visa application you have to visit https://ceac.state.gov/genniv/ from here you can start a new application or retrieve you existing or old application.
Step 9
Once you are redirected to DS 160 page you can create the application here you can see the Application ID in red Font which you can copy and paste on main profile page on CGI Portal and continue filling up the form.
For DS 160 Non immigrant Visa application you can fill the application and save and exit once you booked the appointment then you can submit and sign meanwhile you can save it for further processing.
Step 10
Once you generate your DS 160 application confirmation and add it to your profile you can continue you application and ad dependent to your profile and continue.
Step 11
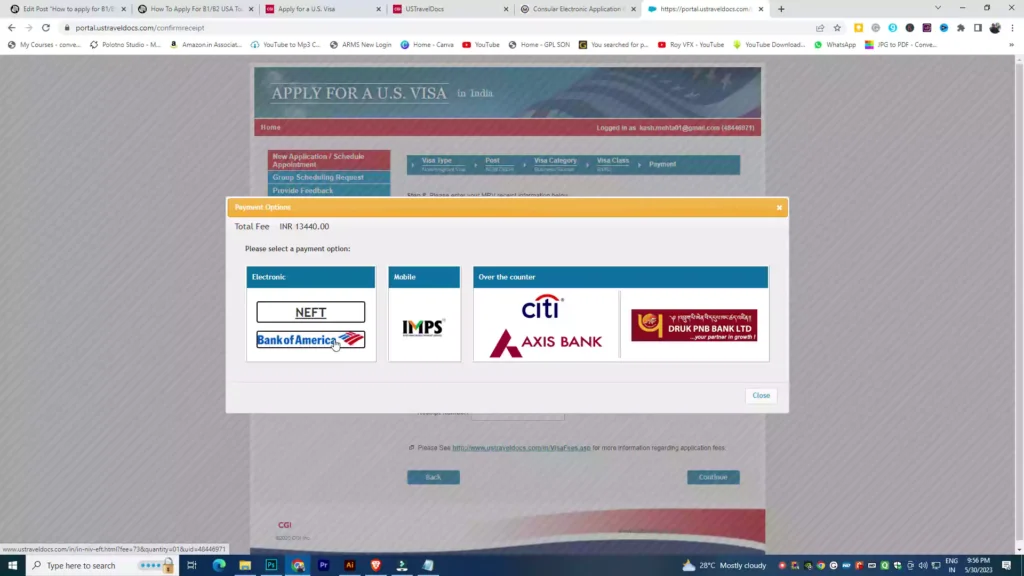
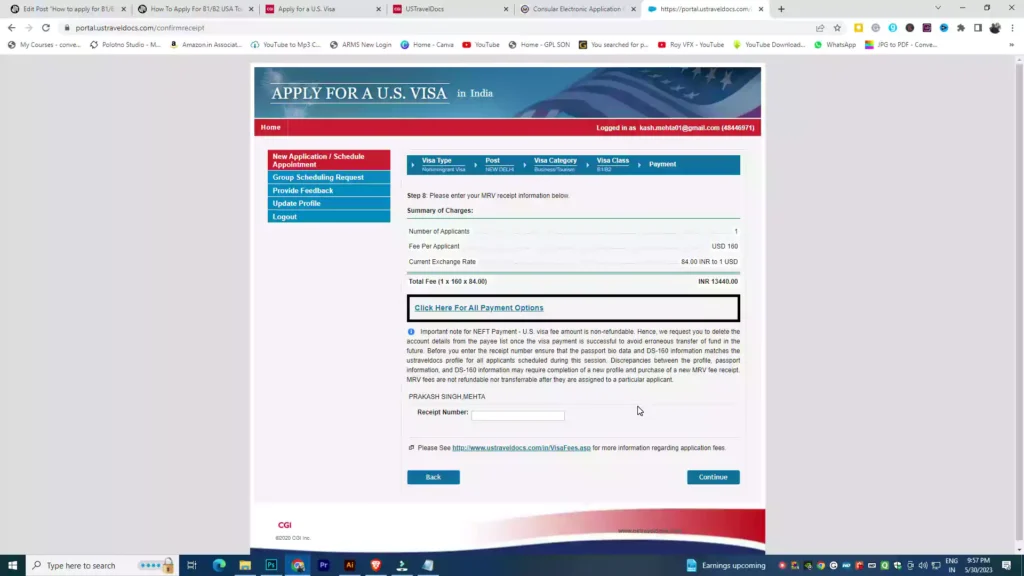
Once you complete all the necessary steps you can choose the pick up or delivery of passport and continue then it will generate a CGI Fee receipt for your US VISA Fees which can be paid online or via Banks in India CITI and Axis Bank accept the payment.
Once you paid the fees it will reflect in maximum 24 Hours once updated you can schedule your appointment for OFC fingerprinting and with Consular.
Once you have schedule you interview you can visit DS 160 non immigrant Visa application complete it and sign and submit for your reference you will get the application PDF and one Confirmation Page after successful submitting your application which will be required at the time of interview.
Frequently Asked Questions
Where to apply for USA Visa for Tourist?
You can apply it on USTravelDocs CGI Portal here is the link https://www.ustraveldocs.com/ here you can choose the location and continue with the process.
Where to access Non immigrant DS 160 Visa application?
You can visit https://ceac.state.gov/genniv/ and start a fresh application or retrieve your old or existing application.
How to track you passport once submitted for US Visa?
You can apply it on USTravelDocs CGI Portal here is the link https://www.ustraveldocs.com/ here you can choose the location and continue with the process.
How to check Visa application Status?
Now you can check DS160 Nonimmigrant Visa application online https://ceac.state.gov/CEACStatTracker/Status.aspx?App=NIV&eQs=WwjqOlbeRYzCYubaSQI+RA== click here and track.
Joshi Milestoner is a website working continuously to deliver the best on travel, adventure and airports & aviation. Do not forget to read our blogs and for any queries you can write to us our team will be happy to help you.
Get notified of our blog post via email by subscribing to our Newsletter with the link provided below and do consider subscribing our YouTube channel (Joshi Milestoner) too for more you can follow us on Google News.

Affiliate Disclosure / Disclaimer: Blog Post on our website may contain affiliate links/ Banner. By Clicking and by purchasing the commission can be earned by us (at no extra cost to you) if you purchase anything through the links provided on this website.


Good luck 🙂